Strawberry Island
| Author: |
Takahiko Nikaido |
| Release: |
"MSX•FAN" Dec. 1990 Issue |
| Program length: |
6 screens |
Joystick support:
"STICK(0)" is found in the line #140."STRIG(0)" is found in the lines #150 and #240. The quickest way is to simply replace each "0" with "1".
In addition, modify following lines.

 Now you can
use Trigger 2 to restart the current level.
Now you can
use Trigger 2 to restart the current level.U-Ball
| Author: |
Gen |
| Release: |
"MSX•FAN" May 1990 Issue |
Creating custom levels:
(The following is only an English translation of page 64 of the May 1990 issue of "MSX•FAN".)Specify the total number of levels in line #760. The data for each level is in lines #770~890.
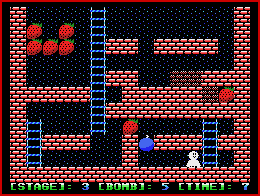
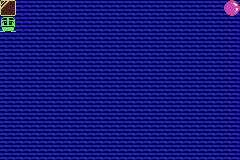
Now suppose to create the 14th level as below.
 (This level was designed by "MSX•FAN" team.)
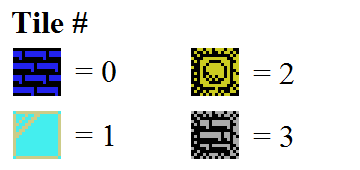
A level consists of 15 * 10 = 150 tiles. There are 4 types of tiles from "0" to "3":
Create a "tile map" as below.
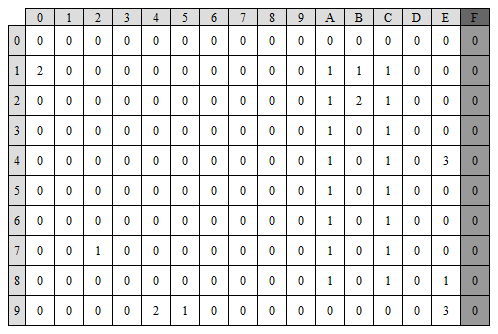
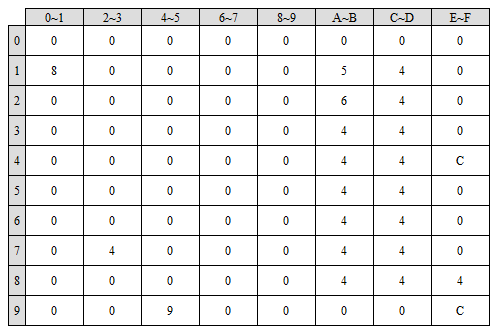 |
Then, merge each of the two cells as below to convert them into a new "tile map" as shown on the left. 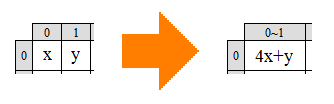 |
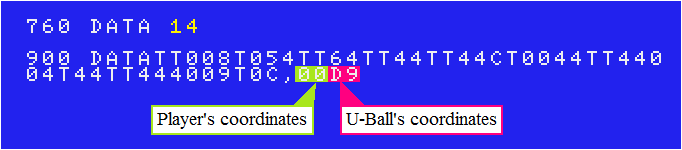
000000008000054000000640000004400000044C000004400000044004000440000004440090000C
You can replace "000" with "T".
By the way, it is also possible to omit any 0 or T after the last character except 0 or T.
But you have to complete the 13th level to see this new 14th level because we can't choose the final level at the title screen.
If you want to play additional levels soon, you can add a dummy-level as the final level.
"Dummy" example:

My suggestions for English version:
To my surprise, the original ending message was in Japanese.Here is my suggestions for that ending message and a short message when loading the game.
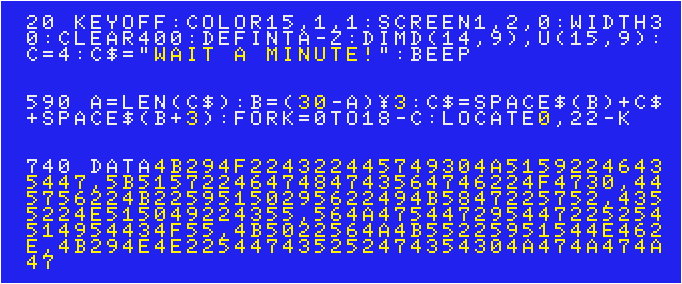
Each checksum becomes as below (using version 2.1 coded by the "MSX•FAN" team).
20> 94, 590> 68, 740> 94
Joystick support:
The game originally supports a joystick, but you can modify following lines to avoid pressing Esc / F1 keys.After modified the line #140 as below and deleted the line #150, you don't have to press Esc key anymore.

After modified the line #250 as below, you can restart the current level by Trigger 1 instead of F1 key.

For modern emulator users:
It may be hard to control your main character.
Either redefine Joystick's D-pad to any keys other than directional keys, or delete one of "STICK(0)ORSTICK(1)".
"STICK(0)ORSTICK(1)" is in the lines #250 and #550.
Whiz damonne♥️
| Author: |
Komeya no Cha-cha-cha (米屋のチャチャチャ) |
| Release: |
"MSX•FAN"
Aug. 1990 Issue |
| Japanese
title name: |
"WHIZだもんね♥️" |
An item you got last should be shown in parentheses in the lower right corner of the screen.
STOP key (F7 key on Amiga keyboard): Pause / Resume.
(The following is only an English translation of pages 62~63 of the August 1990 issue of "MSX•FAN".)
Creating custom levels:
There is a level editor that allows you to freely change the appearance order of enemies, BGM, etc by "MSX-FAN" team.For your first time:
The original "Whiz damonne" program (suppose to name it "WHIZ.BAS") must have been saved to a diskette.
The level editor (suppose to name it "WHIZ-ED.BAS") must be saved on the same diskette.
Load and run "WHIZ.BAS" first.
 |
After it shows the title screen, press Ctrl key and STOP key (F7 on Amiga keyboard) to return to the Basic screen. Then load and run "WHIZ-ED.BAS". |
 |
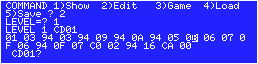
It asks as following. COMMAND 1)Show 2)Edit 3)Game 4)Load 5)Save ? From now on, this state will be called the command mode. The first thing you need to do is to enter 5 to save. If you type 5 and press the return key, you will get a following message: SAVE OK? Enter "Y" and press return. You will get a following message: SAVED. |
This is the original version, of course, but it will be overwritten when you edit levels and save them in the future.
Next, you must enter 4 and press the return key in the command mode to load.
Every you turn off/on MSX, it is necessary to load "WHIZ.BIN" by selecting 4)Load each time.
It asks "LOAD OK?".
Enter "Y" and press the return key.
If the message "LOADED." is displayed, the loading is complete.
After selecting 4)Load, if you want to cancel it, just press the return key without typing anything.
Now you can edit each level. Suppose to edit the 1st level.
Enter 2 and press the return key in the command mode to edit the level.
It asks "LEVEL=?". Enter 1 and press the return key to edit the 1st level.
There are two methods to edit the level.
 |
Method 1: Move the cursor to the displayed data, change the values where you want, and press the return key. This would be an easy way to slightly modify an existing level. |
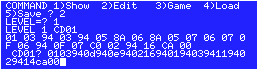 |
Method 2: A cursor should appear next to the first address, and from there you can enter the level data. This is recommended if you are designing a whole new level. |
 |
Event 01 Play normal BGM. |
 |
Event 02 Play Boss's theme. |
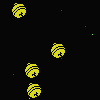 |
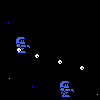
Event 03 Bells in which items are contained. You can't get an item if you destroy a bell, though. |
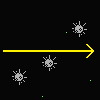 |
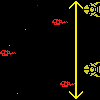
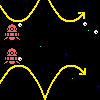
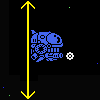
Event 05 Spikes moving as shown on the left. |
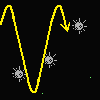 |
Event 06 Spikes moving as shown on the left. |
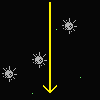 |
Event 07 Spikes moving as shown on the left. |
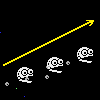 |
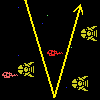
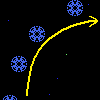
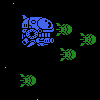
Event 09 Enemies moving as shown on the left. |
 |
Event 0A Enemies moving as shown on the left. |
 |
Event 0B Enemies moving to the right while jumping. |
 |
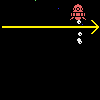
Event 0C Enemies that change the direction of movement midway toward the player. |
 |
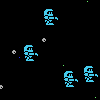
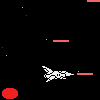
Event 0D Enemies moving as shown on the left |
 |
Event 0E Enemies moving as shown on the left. |
 |
Event 0F One eye enemies moving like slugs. |
 |
Event 10 Enemies moving as shown on the left. |
 |
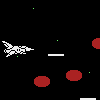
Event 11 Enemies moving as shown on the left. |
 |
Event 12 Traps moving as shown on the left. |
 |
Event 13 Traps moving as shown on the left. |
 |
Event 14 A boss enemy that doesn't track player's ship. |
 |
Event 15 A boss enemy that tracks player's ship. |
 |
Event 16 A boss enemy moving up and down. |
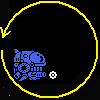 |
Event 17 A boss enemy that moves in a circular motion. |
 |
Event 18 A boss enemy charges toward player's ship. |
 |
Event 80~8F The higher the value, the longer waiting time after the enemy disappears from the screen. |
 |
Event C0~FF The higher the value, the longer waiting time after the enemy disappears from the screen. |
• The total number of events for one time is limited to 200 (because of ”CLEAR200”.)
If you want to make a longer level, you can enter the data in the 2nd method, and then make the last data other than 00 and press the return key.
Then a new address and ? will be displayed, and you will be able to enter the rest of the data for that level.
If you enter 00 at the end, that will be the end of the level data and you will return to the command mode.
• The maximum total number of events for all levels is 768.
• Always enter a special waiting time after the final event of each level.
• The end of the final level should be 0000.
You don't always have to save.
If you want to play with your modification after you turn off your MSX (Amiga CD32),
or if you want to play with MSXAdvance (see below), you need to save it. Enter 5 and press the return key in the command mode to load.
It asks "SAVE OK?"
Enter "Y" and press the return key.
If the message "SAVED." is displayed, the saving is complete.
After selecting 5)Save, if you want to cancel it, just press the return key without typing anything.
Finally enter 3 and press the return key in the command mode to play with your modification.
To return to the command mode from gaming, press CTRL+STOP, however, this wouldn't be recommended.
It recommends you to reset MSX (an emulator) if you edit the level(s) again.
By the way, if you enter 1 in the command mode, it shows the level data.
After it asks "LEVEL=?", enter the level number you want to see.
Amiga CD32 users:
Unfortunately it's too sluggish to play this game if CPU is 020.
You can disable BGM using this level editor, however, the game speed is still too slow.
SNES+AD Adapter users:
Do the same thing on blueMSX until you get to the point where you overwrite "WHIZ.BIN".
Make sure that both "WHIZ-ED.BAS" and "WHIZ.BIN" are in the same disk.
If you use the loader, please make it load "WHIZ-ED.BAS".
If you don't use the loader, rename "WHIZ-ED.BAS" to "AUTOEXEC.BAS".
Use DSK2ROM to convert that disk to a ROM file, and then use MSXAdvance to convert it to a GBA file.
>>Return to the "Type-in MSX programs" page